

How to Create a Colorful Business Layout

Before I begin this tutorial, I want to tell you about our 60,000+ premium design items package, which you will be able to download instantly and use in your own or client designs. Become a member of Ultimate Designer Toolkit before you proceed to get instant access to all of them and design like a pro.
Now to begin this tutorial, we will need to create a new document. I will set the background of the document to #efefef

I will select Rectangle Tool, and i will make a big gray shape. –

Then for this shape i will add the following layer styles. –


In the middle of the previous shape i will add another one but this time i will use Rounded Rectangle Tool. Over this shape i will add a image with a nice bokeh effect –

Also for this image i will add some layer styles.


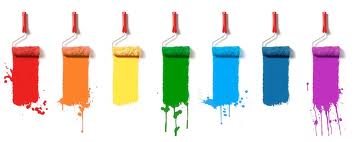
Under the big image with this nice colorful layout i will create 4 different shapes. Try to use different colors. –

Now i will create another layer ( press on CTRL+SHIFT+ALT+N ) and over this layer i will use Brush Tool with a smooth round tip to make the following drawing. It is easier to make a selection of the orange shape before you add the drawing with brush tool. –

Then for this layer i will change the blending mode to overlay, and in the same time i will change the opacity to 50% –

I will duplicate this layer with this nice lightning effect, and i will place it over the other shapes. Click on the following image to see better what i am talking about. –

On top of the web layout i will create a new shape. –

I will use the following layer styles.


Then i will create a small circle with Ellipse Tool –

For this small circle i will add the following layer styles –


Now it is very important to delete the bottom half of the circle. To delete the bottom part first you need to right click on the layer inside your layer palette, and then with Rectangular Marquee Tool make a selection over the bottom part of the circle. After that press on Delete on your keyboard.
Another way is to use the Eraser Tool, after you rasterize the shape.

If you don’t have already a membership with us i recommend you to signup now ( You can find the subscription button on the top of the website ) and you can download the following set of icons: Download 512 Vector icons
Open the .ai files inside illustrator, and then select each icon you want to use.
The steps are very simple:
Go to Adobe illustrator.
Select the icon.
Press on CTRL+C ( Copy )
Return to Adobe Photoshop
Press on CTRL+V ( Paste )
Do the same for all the icons –

For all these icons i will add the following layer styles. –


Between the buttons, i will add some vertical dividers. I will use Line Tool to add the lines. –

Then for each line i will add the following layer styles. –

The next step is to add a simple text logo. If you want another logos you can try to use the 3D Creator which helps you to convert each 2D shape into a very nice 3D shape –

On the bottom of the slideshow i will add another shape with Rounded Rectangle Tool. –

I will add the following layer styles.


Then i will add some circles which are made with Ellipse Tool. I will use the same layer styles i have used for the top vector icons –

With Ellipse Tool, i will crate a new shape.

Then i will load the selection for the orange shape. –

And then i will make sure the white circle is rasterized, and i will delete the outer part of the white shape. Your result should be the following one. –

For this white corner i will add the following layer styles –


I will duplicate all the corners, and i will move them over each box. –

Then i will add another icons, and some text.

On the bottom of the shapes i will add some lines ( please click on the image to see better ) , and of course some text. –

One of my last steps is to add another text with horizontal type tool. –

This is my final result. I hope you like it. You can use this web layout not only for a business layout. With slight modifications you can use it also for a wordpress theme. –

relaxing jazz music
relaxing jazz music
Luckycola
Level Up Your Life: Gain confidence and skills through gaming challenges. Lucky cola casino
jazz instrumental
jazz instrumental
rainy jazz music
rainy jazz music
smooth piano jazz
smooth piano jazz
relaxing october coffee jazz
relaxing october coffee jazz
chill jazz
chill jazz
winter coffee shop
winter coffee shop
Lofi HipHop Mix
Lofi HipHop Mix
coffee work jazz
coffee work jazz
autumn jazz work
autumn jazz work
Type Beat
Type Beat
beach cafe ambience
beach cafe ambience
beautiful harp music
beautiful harp music
Romantic bossa nova
Romantic bossa nova
warm jazz
warm jazz
smooth jazz music
smooth jazz music
spa music
spa music
soothing harp music
soothing harp music
wow gold
Dear immortals, I need some wow gold inspiration to create.
jazz
jazz
bossa nova piano
bossa nova piano
healing music
healing music
study music
study music
músicas para treinar
músicas para treinar
relaxing
relaxing
sax jazz
sax jazz
relax music
relax music
musica de treino
musica de treino
relaxing piano music
relaxing piano music
sweet bossa nova
sweet bossa nova
melhores músicas de hip hop para treinar
melhores músicas de hip hop para treinar
relaxing sleep music
relaxing sleep music
japanese trap hip hop
japanese trap hip hop
healing meditation
healing meditation
meditation music
meditation music
Rastrear Teléfono Celular
El software de monitoreo de teléfonos móviles CellSpy es una herramienta muy segura y completa, es la mejor opción para un monitoreo efectivo de teléfonos móviles. La aplicación puede monitorear varios tipos de mensajes, como SMS, correo electrónico y aplicaciones de chat de mensajería instantánea como Snapchat, Facebook, Viber y Skype. Puede ver todo el contenido del dispositivo de destino: ubicación GPS, fotos, videos e historial de navegación, entrada de teclado, etc.
linetogel
🌟 Incredible, this is truly remarkable! I’m grateful for the effort you devoted to sharing this priceless information. It’s always fantastic to discover skillfully written and insightful content like this. Keep up the outstanding job! 🔥👏💯
linetogel
So excited to share my thoughts here! 🌟 This content is refreshingly unique, combining creativity with insight in a way that’s captivating and educational. Every detail seems carefully put together, exhibiting a deep grasp and passion for the subject. It’s extraordinary to find such a perfect blend of information and entertainment! Kudos to everyone involved in creating this masterpiece. Your hard work and dedication shine brightly, and it’s an absolute joy to witness. Looking forward to seeing more of this amazing work in the future! Keep amazing us all! 🚀👏💫 #Inspired #CreativityAtItsBest
linetogel
🚀 Wow, blog ini seperti perjalanan kosmik melayang ke galaksi dari kemungkinan tak terbatas! 💫 Konten yang menegangkan di sini adalah perjalanan rollercoaster yang mendebarkan bagi pikiran, memicu kegembiraan setiap saat. 💫 Baik itu gayahidup, blog ini adalah harta karun wawasan yang menarik! 🌟 🚀 ke dalam perjalanan kosmik ini dari imajinasi dan biarkan pikiran Anda berkelana! ✨ Jangan hanya mengeksplorasi, alami kegembiraan ini! 🌈 Pikiran Anda akan bersyukur untuk perjalanan mendebarkan ini melalui dimensi keajaiban yang menakjubkan! ✨
Rastrear Teléfono Celular
Ubíquelo a través del software del sistema “Find My Mobile” que viene con el teléfono o mediante un software de localización de números de teléfonos móviles de terceros.
inscreva-se na binance
Thanks for sharing. I read many of your blog posts, cool, your blog is very good. https://www.binance.com/pt-PT/join?ref=V3MG69RO
jazz piano music
jazz piano music
cafe bossa nova
cafe bossa nova
new york
new york
daftar masuk
The weather couldn’t be more perfect, and neither could your post. It’s truly a day to be grateful for.
alternatif link
wow, amazing
100 TERPERCAYA
nice content!nice history!! boba 😀
togel online
nice content!nice history!! boba 😀
Mag-sign up upang makakuha ng 100 USDT
Thanks for sharing. I read many of your blog posts, cool, your blog is very good.
Binance
Your article helped me a lot, is there any more related content? Thanks!
MavisF
You have observed very interesting points! ps nice internet site.Blog money
Тегн акаунт жасау
Can you be more specific about the content of your article? After reading it, I still have some doubts. Hope you can help me.